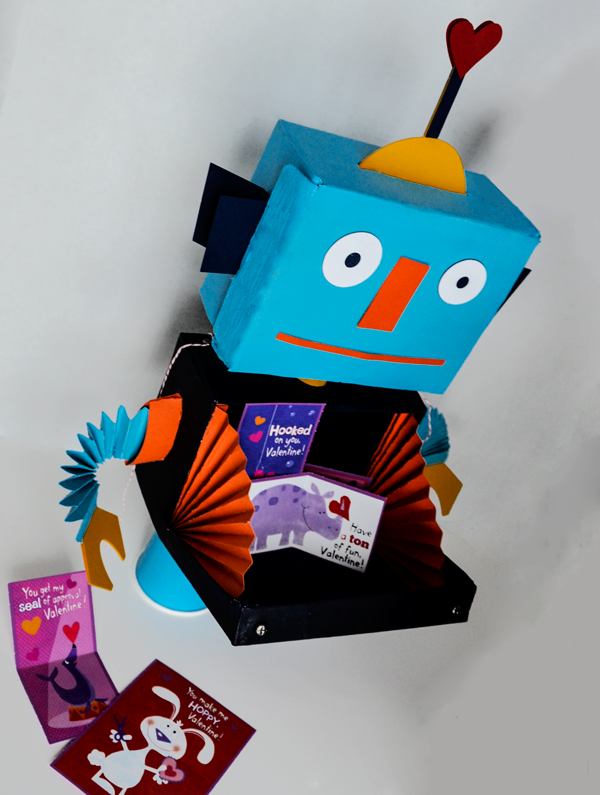
Everyone will be "Nuts and Bots" about this Valentine Box. Modify one of our favorite new Cut Sets to make this electrifying box perfect for your little guy or girl.
Materials Used:
Curiosity Cut It SetAccordion Fold Rosettes Cut It ProjectSNF Simon Says FontShoe boxes (I used smaller kids shoe boxes)
gesso or paint primer
paint
spray adhesive
glue gun
paper cups
screw brads
Directions:
Decide where you want your valentine opening and cut those holes in your boxes. I cut my hole in the top center where the antennae is glued to, and a 2nd hole in the bottom box on the back. Then proceed by applying gesso or primer to your shoe boxes. If you are using shoe boxes with a sheen, a spray oil based primer would work better for you.
Let your boxes dry completely and then cover with either acrylic paint or spray paint. I painted the body Prussian Blue and the top box Island Blue just using craft acrylics. Again, if you have a shinier shoebox, opt to use a spray paint instead.
Cut out and assemble the robot pieces from the
Curiosity Cut It Set. For the face, you can cut it out like it is, which will cut the square with the nose and mouth, or to save paper you can bring the item in
Make-The-Cut and break it apart (Right click>shape magic >control B). This enables you to delete the face and eye holes and just cut the nose and mouth.
For the arms I used
Accordion Fold Rosette 08. And brought into
Make-the-Cut pasting it twice, then flipped the second one, so I had a mirror image. (Right click>shape magic >control F).
Then I overlapped the two just slightly, and welded them together. (Right click>shape magic >control W).
For the Nuts and Bots about You, I just used the font SNF Simon Says cutting it out directly in
Make-The-Cut. I created mirror images of any pieces I would see the back on, like the antennae, hands and knob ear things. I also added an additional little rectangle to the bottom of the antennae and knob ears so that I had a flap to fold over and glue, like shown. I also added little hearts to the antennae and meter arrow on the front.
And here are what all the pieces look like before putting them on the box.
Once the boxes dried, I started to embellish with my robot accents. I glued my antennae to the slot I cut out for the valentines to drop in.
My shoe boxes had the flip open lids, so I decided to create a little accordion fold piece of paper to attach to each side of the opening on the robot's tummy. You can either use the rosettes again for this and just expand the width, or accordion fold your own piece of paper like shown.
I then glued one end together so it created a fan shape.
I glued the fan to both sides of the box from lid to side. Be sure to check out last picture to see the full effect of this below.
I used just a tabbed strip, to go around the arms and legs. You can make this yourself, or we have many projects that include them like the
Boom-De-Yada Cut It Firework Project. I sized the strip so that it was about 1.25 inches tall and 10 inches long. I cut 4 this size for the arms and legs.
I ended up trimming the arm ones down to about 6 inches in length. I folded in half like shown below and wrapped around the arm and then glued into place.
I kept the leg pieces circular and used the whole 10 inches gluing to the bottom of the robot's belly. I then glued the cups in the center of these pieces upside down.
For the neck you will be cutting another strip, but you will need tabs on both sides, so you can follow the directions we used to create the arms by merging two of the strips together. The final strip should be about 2 inches high and 10 inches in length. I wrapped this together more tightly to create a sturdier tube. You will glue the two boxes together with this.
Glue on the head and you have one amazing Love Bot! You can choose to add the screw brads to the top to better hole the box together if you think it needs it, or just for a fun embellishment!